I guess you’ve downloaded and installed iOS 26 beta on your device in the past few days, right? Although iOS 26 brings some exciting features but some devices may encounter issues such as overheating, battery drain, or lag after installing iOS 26 beta. This is completely normal because it’s a major update and it’s currently in the beta stage.
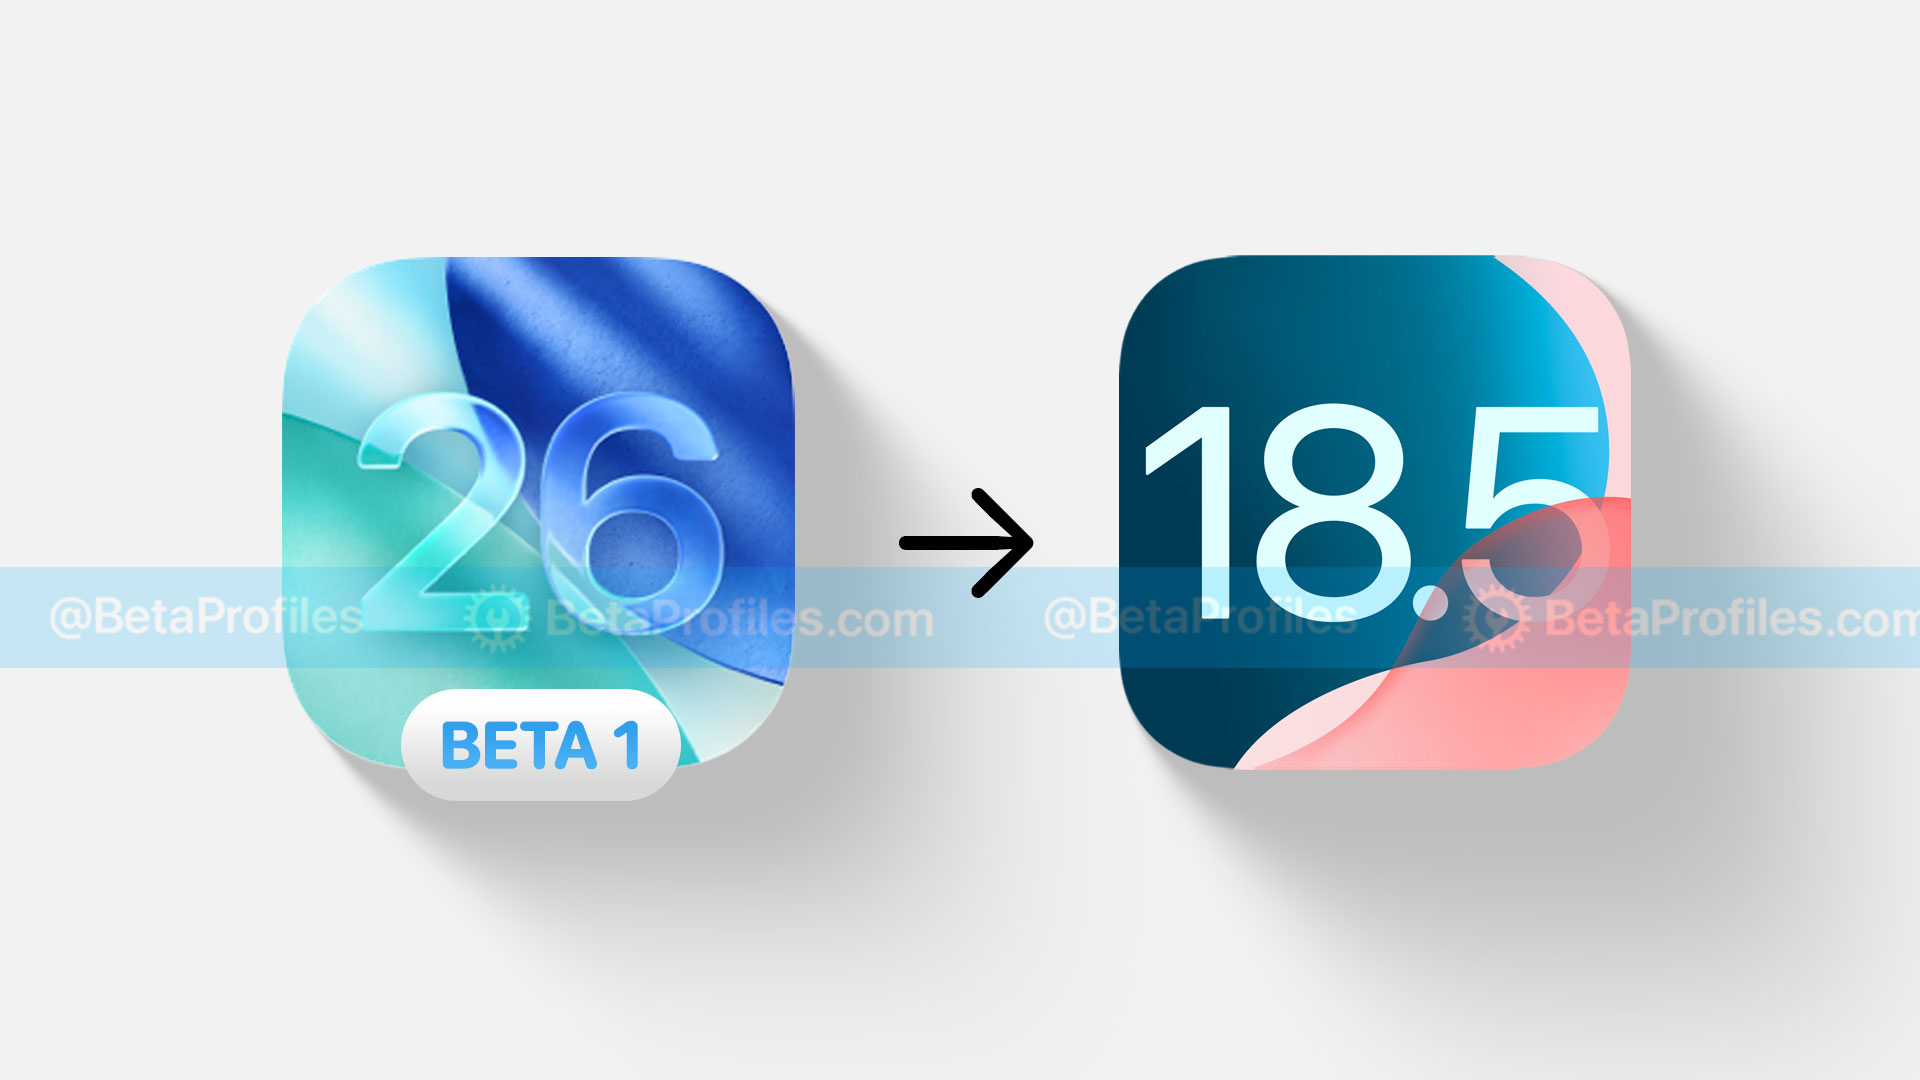
If you don’t want these issues to occur on your daily-used iPhone, here’s a guide to downgrade from iOS 26 beta to iOS 18.5 without losing data.
Preparation
- Mac or Windows computer
- Lightning or USB-C cable capable of data transfer, usually the one included with your iPhone, iPad
- IPSW file for your device
Download IPSW file for iOS 18.5 (22F76)
- iPhone 16e
- iPhone 16 Plus
- iPhone 16
- iPhone 16 Pro Max
- iPhone 16 Pro
- iPhone 15 Pro Max
- iPhone 15 Pro
- iPhone 15 Plus
- iPhone 15
- iPhone 14 Pro Max
- iPhone 14 Pro
- iPhone 14 Plus
- iPhone 14
- iPhone SE (3rd generation)
- iPhone 13
- iPhone 13 mini
- iPhone 13 Pro Max
- iPhone 13 Pro
- iPhone 12 Pro Max
- iPhone 12, iPhone 12 Pro
- iPhone 12 mini
- iPhone SE (2nd generation)
- iPhone 11 Pro, iPhone 11 Pro Max
- iPhone 11
- iPhone XR
- iPhone XS, iPhone XS Max
Download IPSW file for iPadOS 18.5 (22F76)
- iPad Mini (7th generation)
- iPad Pro 11-inch (M4), iPad Pro 13-inch (M4)
- iPad (A16) Wi-Fi + Cellular
- iPad (A16) Wi-Fi only
- iPad Air 11-inch (M3), iPad Air 13-inch (M3)
- iPad Air 11-inch (M2), iPad Air 13-inch (M2)
- 11-in. iPad Pro (4th generation), 12.9-in. iPad Pro (6th generation)
- iPad Air (5th Generation)
- 10.2-in. iPad (10th generation)
- 11-in. iPad Pro (3rd generation), 12.9-in. iPad Pro (5th generation)
- iPad mini (6th generation)
- 10.2-in. iPad (9th generation)
- iPad Air (4th generation)
- 10.2-in. iPad (8th generation)
- iPad mini (5th generation), iPad Air (3rd generation)
- 11-in. iPad Pro (1st and 2nd generations), 12.9-in. iPad Pro (3rd and 4th generations)
- 10.2-in. iPad (7th generation)
Temporarily Turn Off Find My
Go to Settings – [Your Name] – Find My – Find My iPhone (or iPad) – Turn off “Find My iPhone”. Then enter your Apple Account password to disable it.
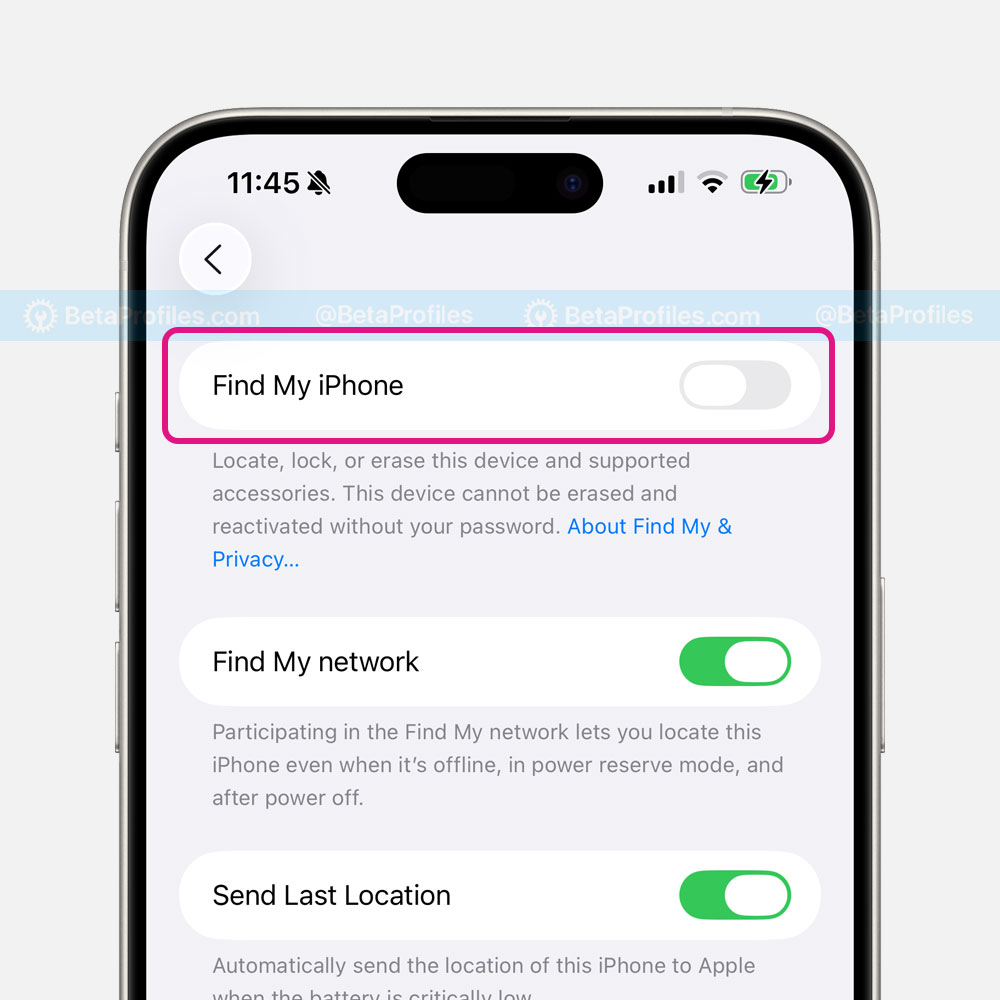
If “Find My iPhone” is grayed out and you can’t turn it off, it means Stolen Device Protection is enabled. You can disable this feature by going to Settings – Face ID & Passcode – Stolen Device Protection, then try turning off Find My again.
 IMPORTANT: Back Up Your Data
Please note that downgrading will erase all of your current data, so make sure to back up your device using iTunes (on Windows) or Finder (on Mac). We’re not responsible for any data loss if you skip this step.
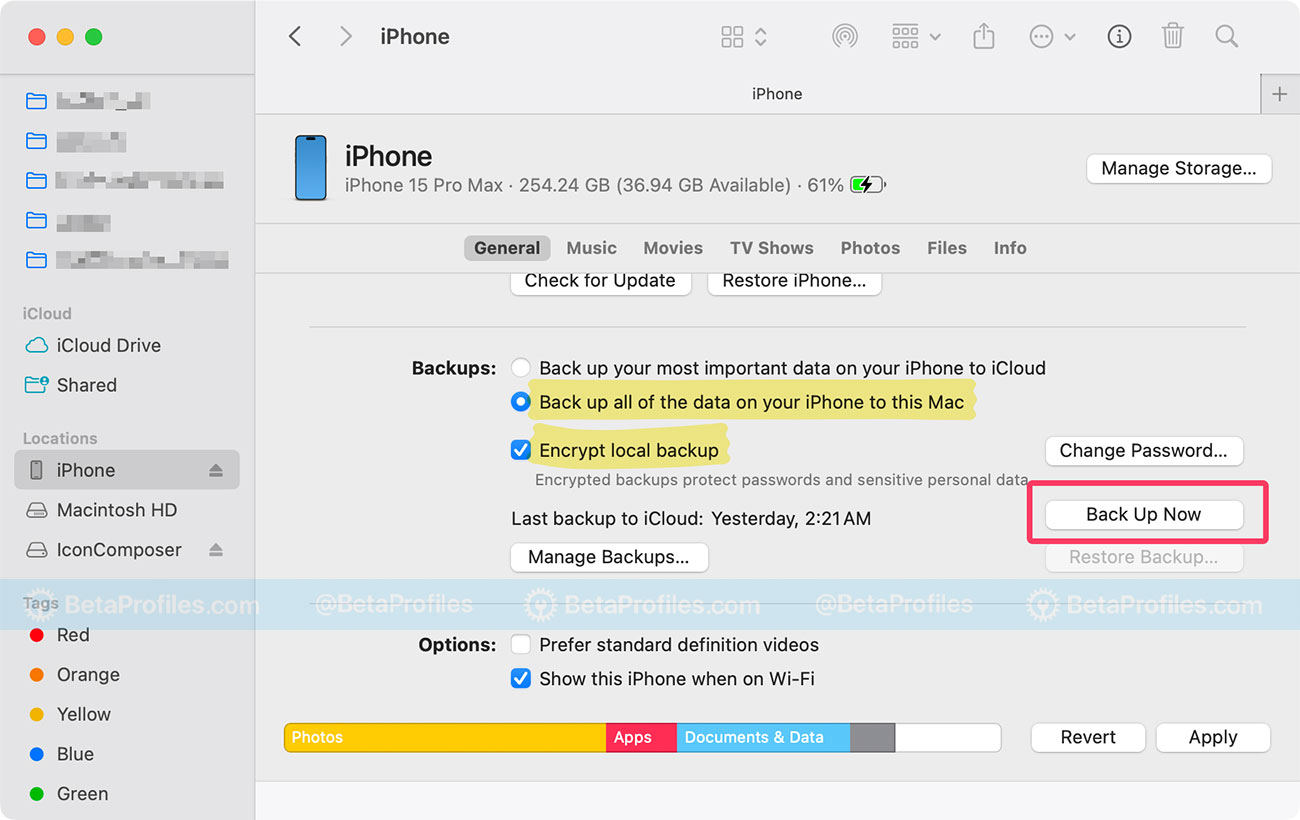
Here’s how to back up your device:
- Open Finder on your Mac or iTunes on your Windows PC. If you don’t have iTunes installed, download it here.
- Connect your device to your computer using a USB to Lightning or USB-C cable.
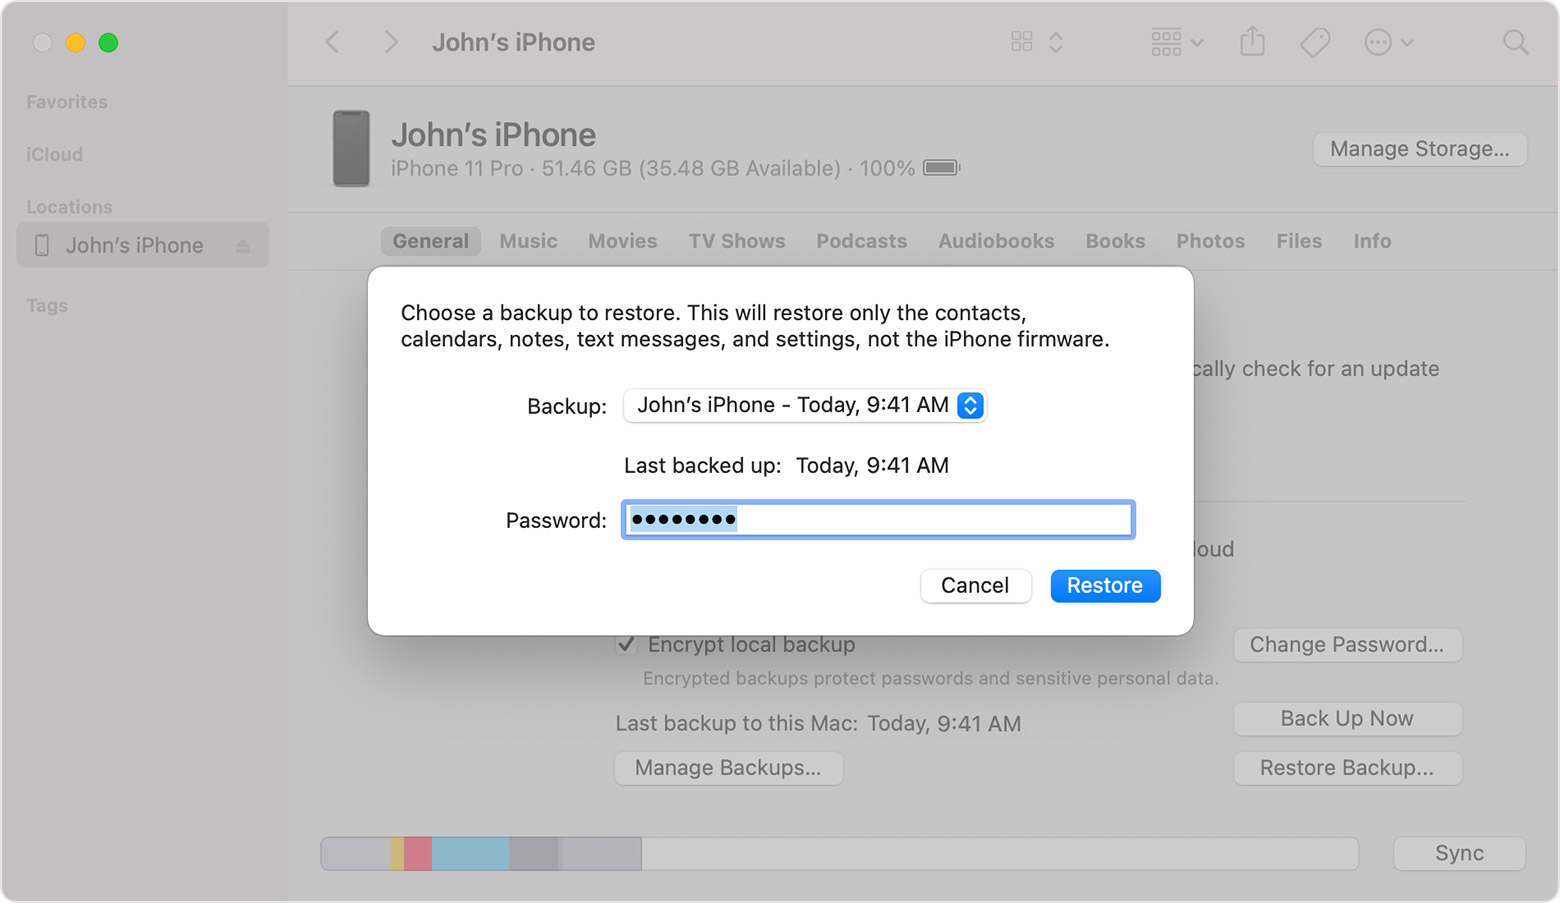
- Select Back up all of the data on your iPhone to this Mac (or This Computer on Windows), and make sure “Encrypt local backup” is checked. Then click Back Up Now .
Downgrade Guide
-
Connect your iPhone or iPad to your Mac or Windows computer using a USB-C or Lightning cable that supports data transfer.
-
Open Finder (on Mac), iTunes, or Apple Devices (on Windows).
-
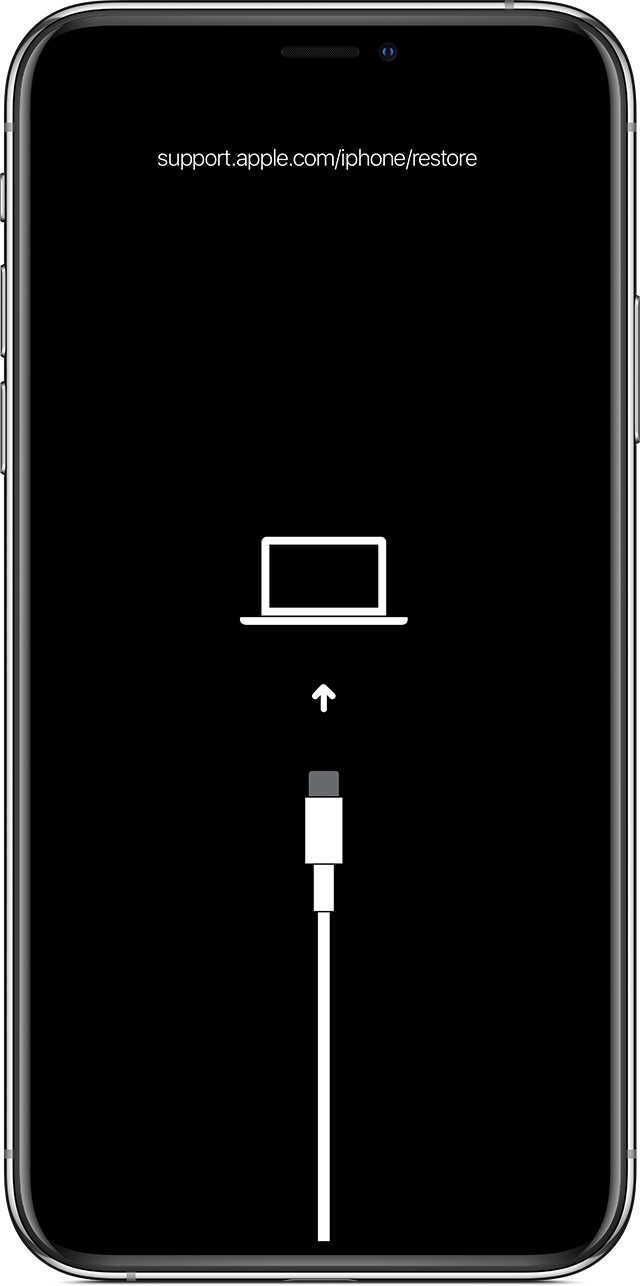
Put your device into recovery mode. The steps vary depending on your iPhone or iPad model. Please refer to Apple’s official guide here: https://support.apple.com/118106
Once your device is in recovery mode, you’ll see the screen shown below on your iPhone.
-
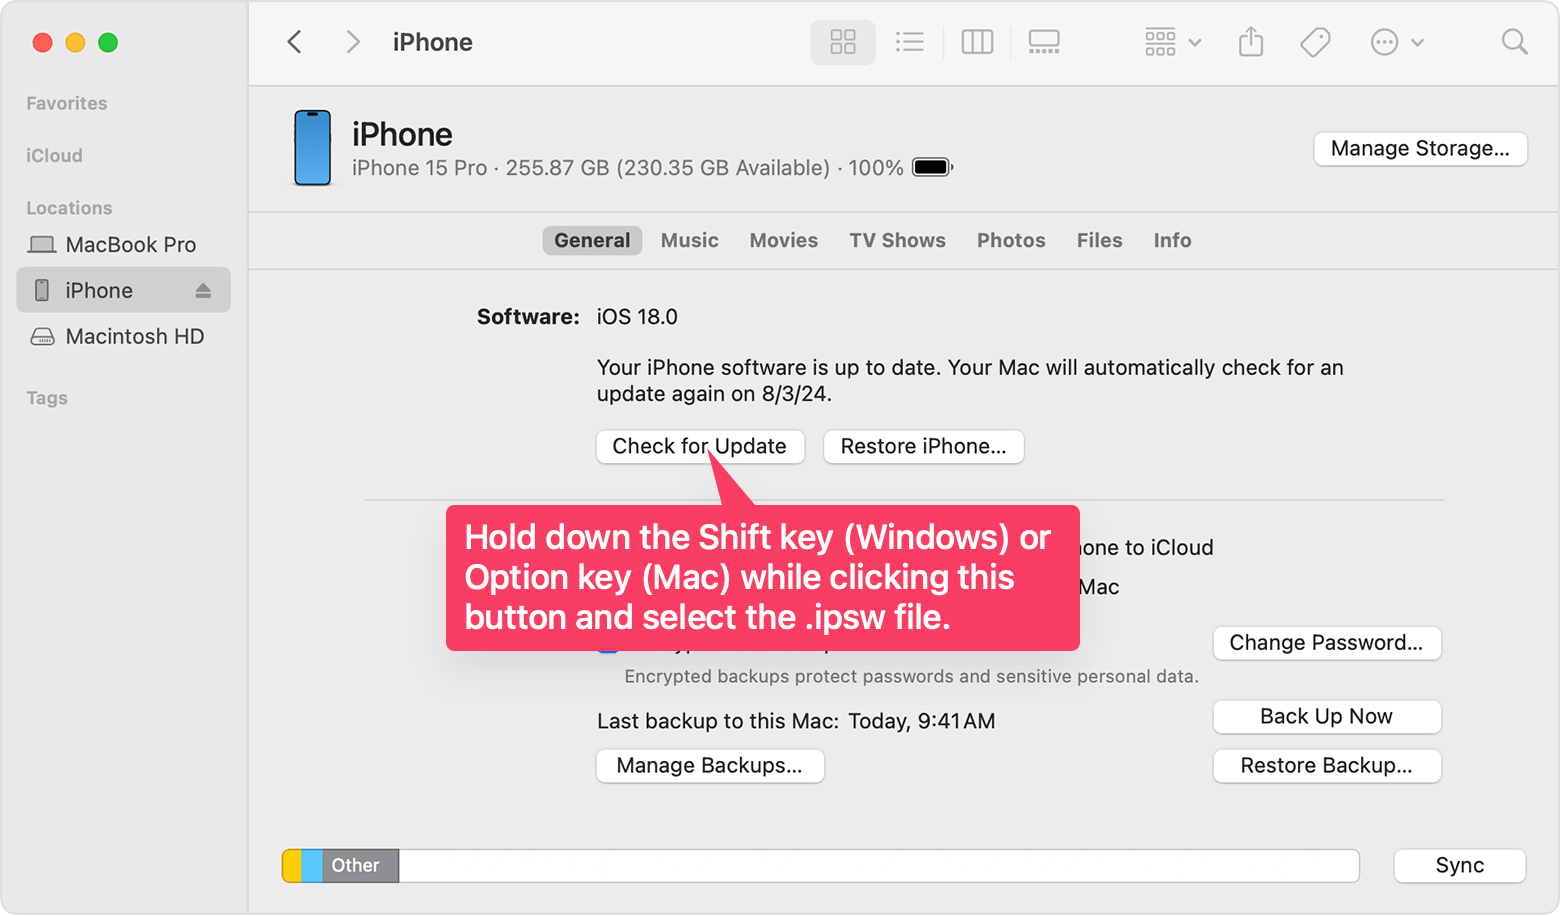
Now go back to Finder or iTunes — you should see a prompt that says “There is a problem with the iPhone…” Hold down the Option key (on macOS) or the Shift key (on Windows), then click the “Restore” button.
-
A window will appear for you to select the .ipsw file you downloaded earlier.

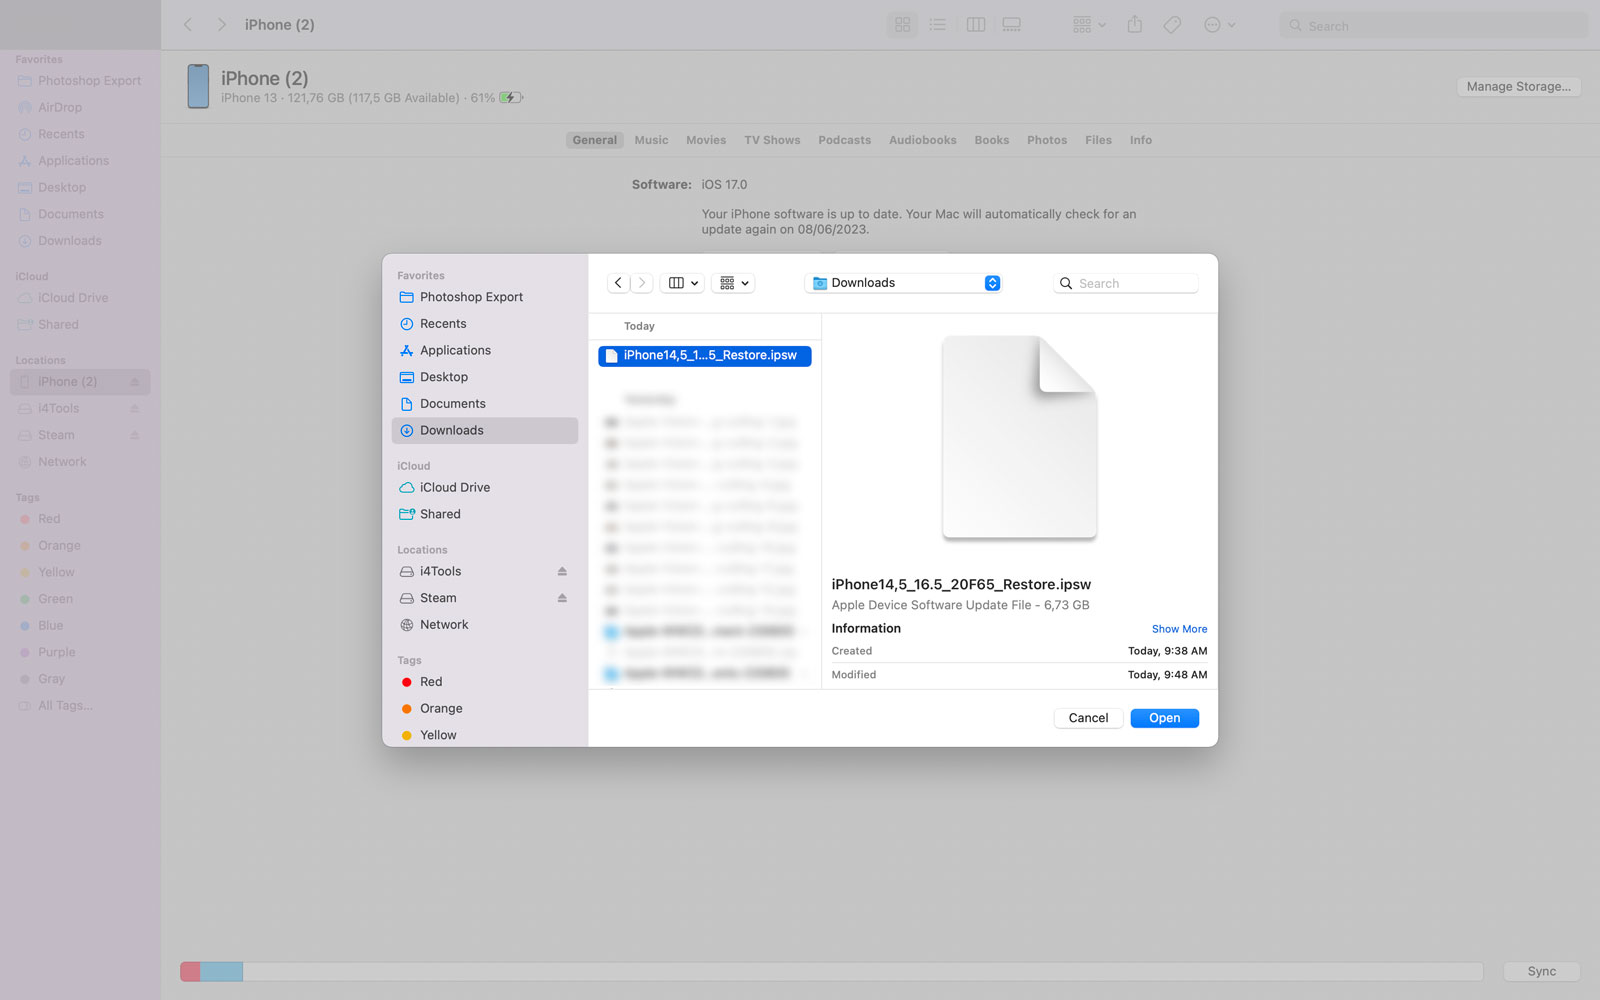
Wait for the restore process to complete, then follow the on-screen steps to complete the activation.
Keep scroll down to learn how to restore your data from a backup.
If the Downgrade Fails
Not everyone succeeds on the first try, so if your downgrade attempt wasn’t successful, simply go through the steps again.
Most downgrade errors people encounter are caused by low-quality or non-MFi-certified USB-C or Lightning cables. If you run into issues during the process, try using a different, high-quality cable.
You can also try putting your device into DFU mode to perform the downgrade.
Steps to Enter DFU Mode:
- Connect your device to a computer using a USB cable.
- Quick-press the Volume Up button
- Quick-press the Volume Down button
- Hold down the Side button until the screen goes black, then hold down both the Side button and Volume Down button.
- After 5 seconds, release the Side button while continuing to hold down the Volume Down button.
- If the Apple logo appears, the Side button was held down for too long.
- Nothing will be displayed on the screen when the device is in DFU mode. If open, iTunes or Finder will alert you that a device was detected in recovery mode.
- If your device shows a screen telling you to connect the device to iTunes, retry these steps.
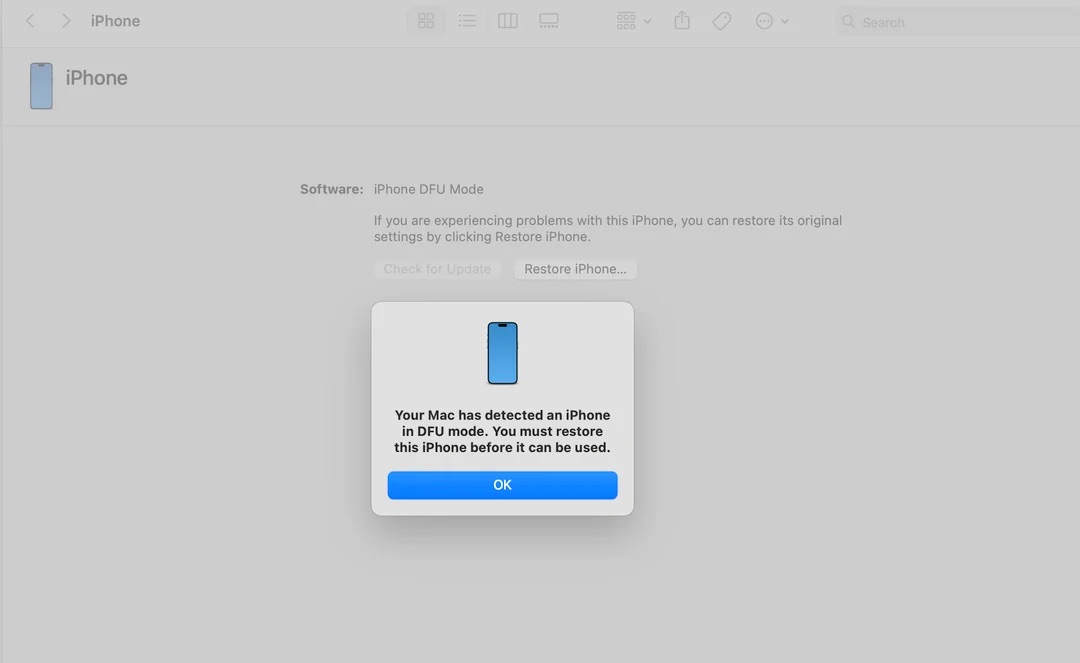
Once Finder or iTunes detects your device in DFU mode, click OK, then hold down the Option key (on macOS) or the Shift key (on Windows) and click the “Restore…” button.
Select the IPSW file you previously downloaded, and wait for the restore process to complete.
Restore Your Data
If You Have a Backup from iOS 18.5
Things are much easier if you backed up your device before installing the iOS 26 beta. Just click Restore Backup… in Finder or iTunes, then choose the backup you made on iOS 18.5.
If You Only Have a Backup from iOS 26 Beta
By default, Apple doesn’t allow you to restore a backup made on a newer iOS version to a device running an older version. For example, a backup from iOS 26 beta won’t be compatible with iOS 18.5. However, there are some workarounds that can make the backup compatible.
That said, using these tricks can lead to various issues, including but not limited to:
- Incorrect icons in the Settings app
- Lost health data
- Call history not showing up
- Wallpaper turning black
- Partial or complete data loss
- Missing photo albums and images
- Restore failures
- Unexplained errors
You should only follow the steps below if you’re fully aware of the risks and are willing to accept them.
UPDATE on June 22:
I’ve added a simple tip to recover all lost data after restoring from a backup, check it out at the end of this guide.
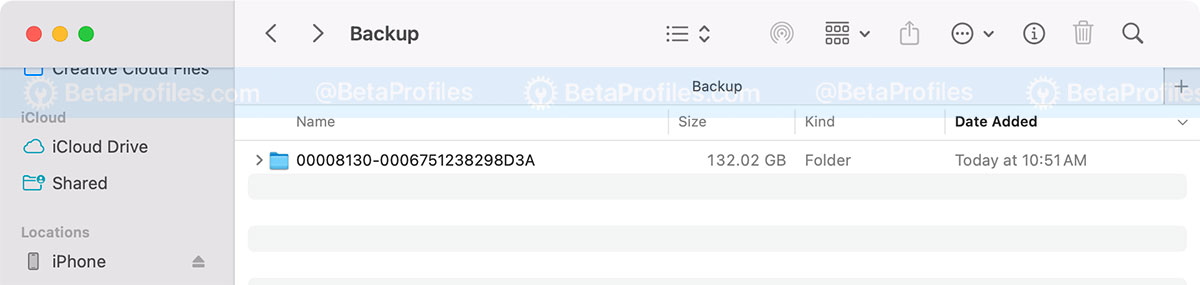
If you’re using a Mac, open Finder, press Command + Shift + G, then enter the following folder path:
~/Library/Application Support/MobileSync/Backup
If you’re using a Windows PC, open File Explorer and navigate to the following folder:
C:\Users\<Your-Windows-Username>\AppData\Roaming\Apple Computer\MobileSync\Backup
-
Inside, you’ll see a folder named something like 0xxxxxxxxxxxxxxxxxxx. This folder contains all the data from your iPhone backup.
-
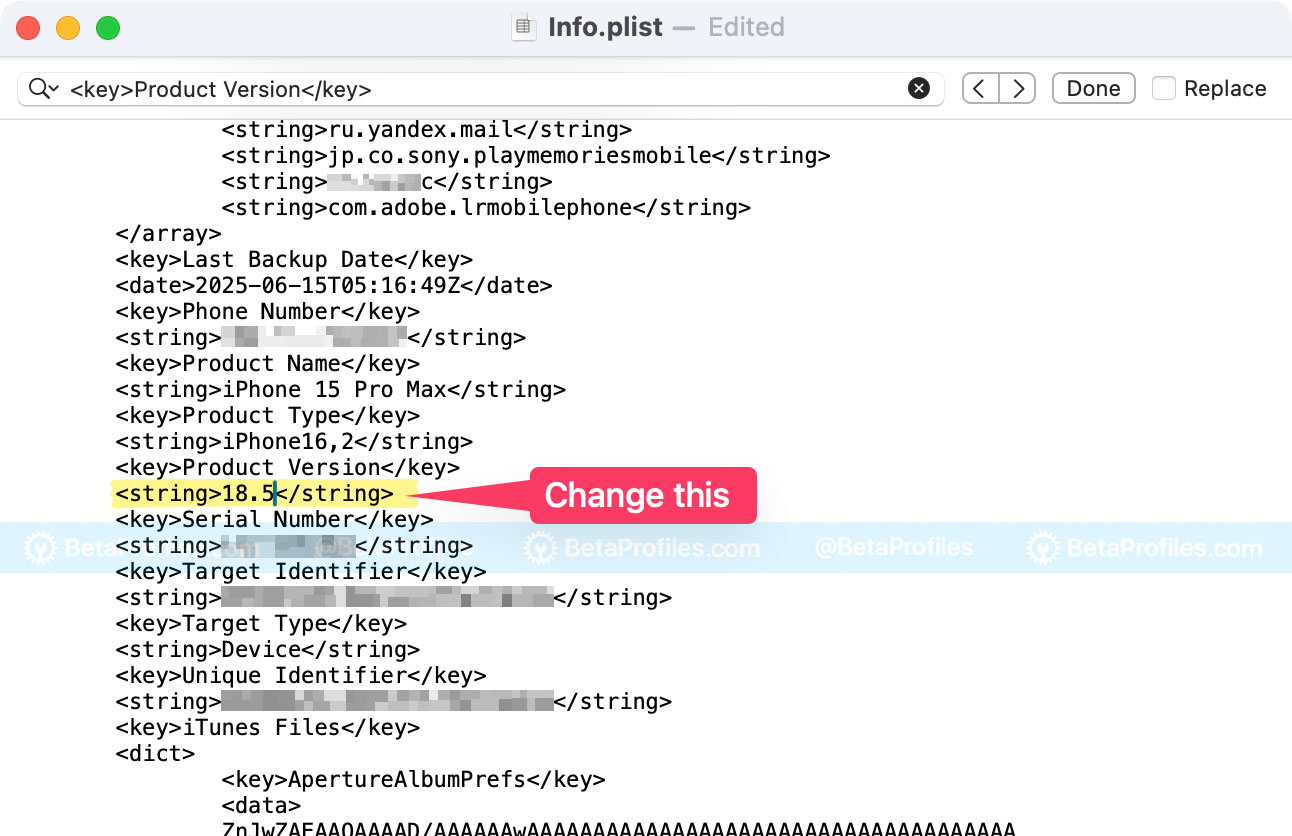
Open that folder, then look for the file named
Info.plistand open it with any text editor, such as TextEdit on Mac or Notepad on Windows. -
Search for the line
<key>Product Version</key>, just below it, you’ll see:<string>26.0</string>, change26.0to18.5and save the file.
-
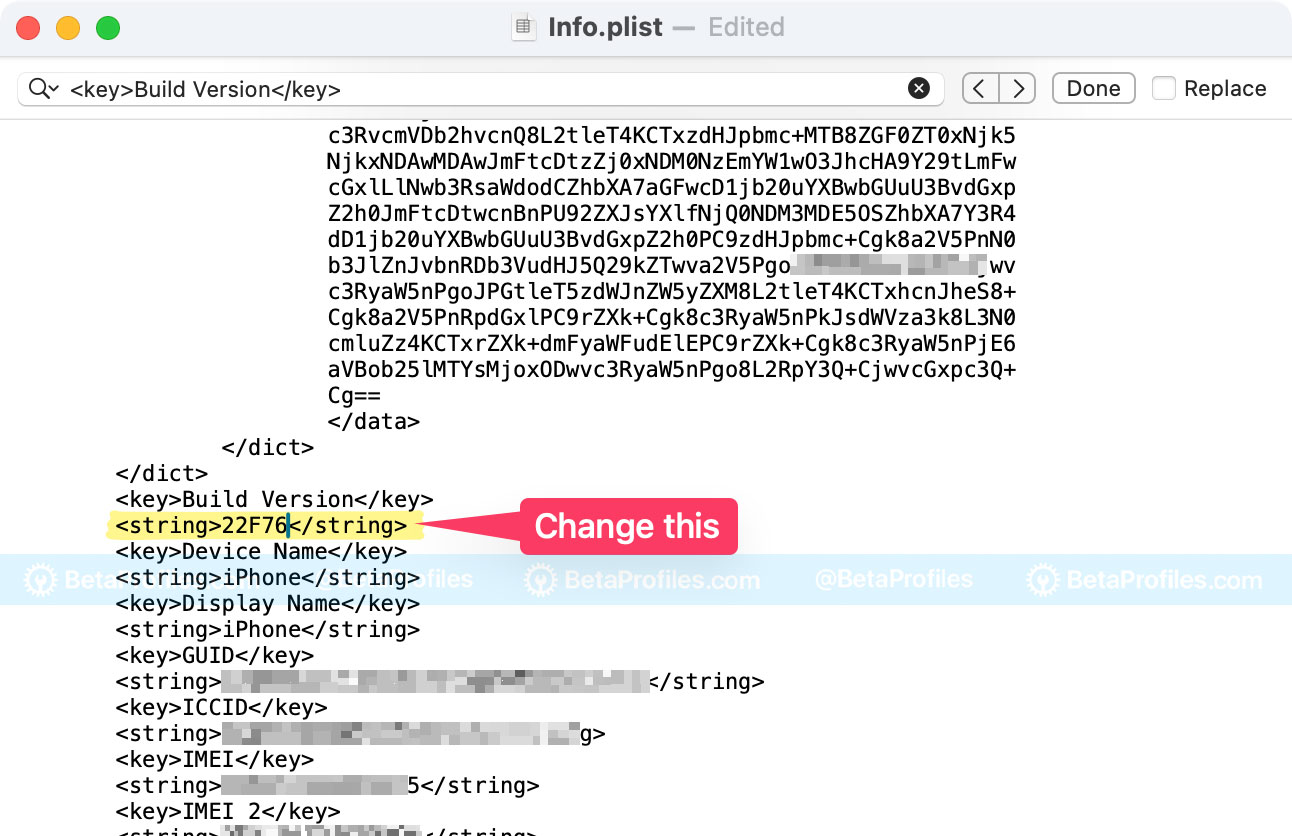
Next, find
<key>Build Version</key>, below it, you’ll see something like<string>XXXXXXXXX</string>, replace the XXX… with22F76and save the file.
-
Finally, connect your iPhone or iPad to your Mac or Windows PC. Open Finder or iTunes, then click Restore Backup… and select the most recent backup.
Wait for the data restore process to complete — once it’s done, your downgrade and data recovery are successfully finished.
![]() UPDATE on June 22:
UPDATE on June 22:
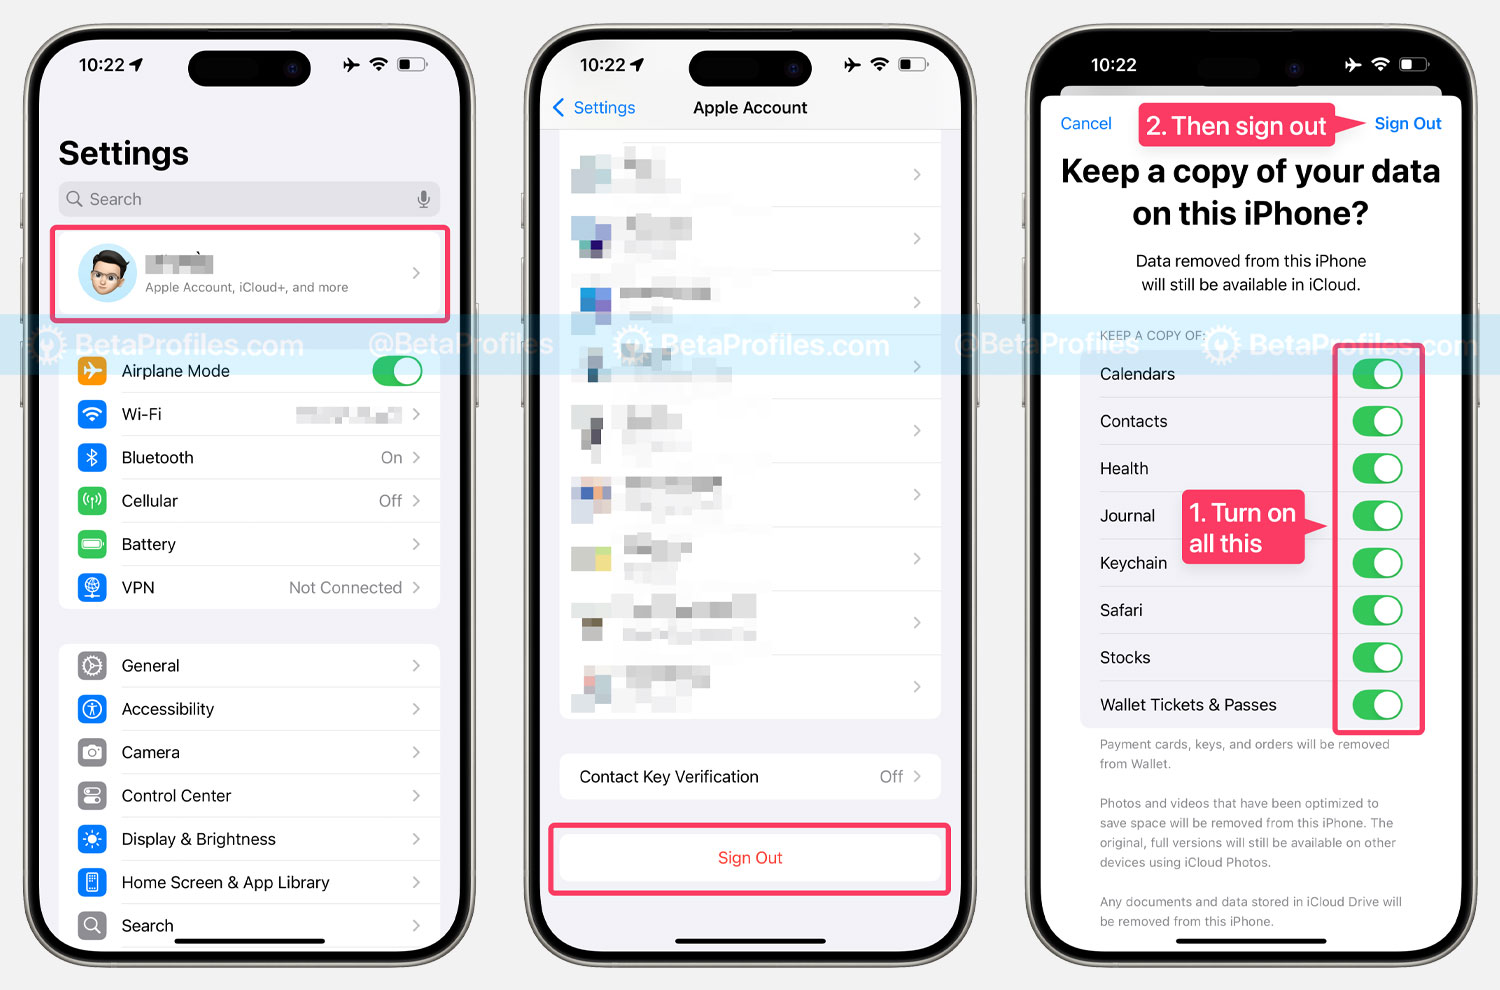
There’s a simple way to get all your data back after restoring from a backup, just sign out of your Apple account and sign back in.
Thanks to @salgado666 for this great tip!
- Go to Settings > [Your Account Name] , scroll down, and tap Sign Out .
- Make sure to keep a copy of your data on the iPhone by selecting all the available options on this screen.
- Tap Sign Out .
- Then, sign back in and wait a bit, your data should reappear on your device.
I hope this guide helps you successfully downgrade your iPhone or iPad. If you have any questions about this guide, please leave a comment below ![]()