One way to update from an iOS or iPadOS beta to an official release that’s no longer being signed is by using a Delayed OTA profile.
As we all know, you can’t install an iOS or iPadOS version that Apple has stopped signing. This is Apple’s way of preventing users from downgrading to older versions—something they’re clearly not in favor of.
That said, there are some exceptions when it comes to iOS or iPadOS beta versions. For example, at the time I’m writing this, iOS 18.3 RC (released in January 2025) is still being signed by Apple. So if you want, you can still upgrade or downgrade to this version—pretty cool, right?
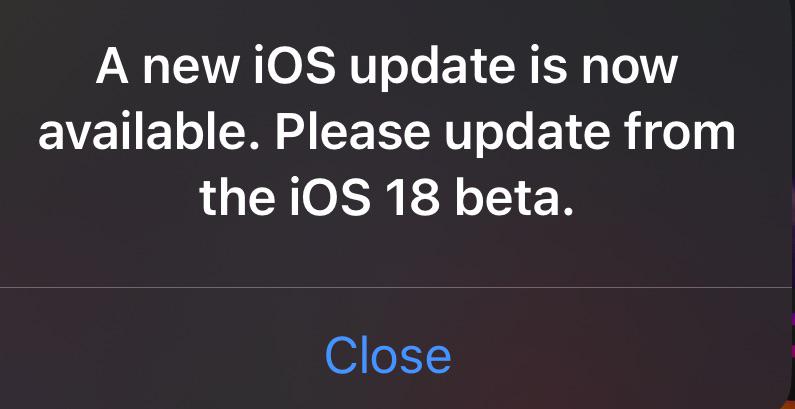
But the problem comes right after that: Apple will show you an annoying pop-up notification every time you unlock your iPhone: “A new iOS update is now available. Please update from the iOS 18 beta.” This is meant to force you to update to the latest official iOS version in order to remove the message.
If you want to keep iOS 18.3 on your iPhone without updating to the latest iOS 18.5, and you’d like to get rid of the annoying update notification, there’s a method called “Delayed OTAs” that I’ll explain below.
How do Delayed OTAs work?
Here’s the best and most straightforward explanation of how Delayed OTAs work, originally from u/misterjrw on Reddit:
When Apple stop signing OS versions, enterprise companies need more time to check the newer version works with their software/apps, so they have a 3 month timer in effect to go the newer version.
We can utilise this 90 day delay to move to certain OS versions even after Apple have stopped signing them for the general public.
You would install a profile which would talk to a different server (afaik) and then you can update OTA to unsigned (but within the 90 day period) OS version.
Delayed OTAs allow you to update a device running an iOS/iPadOS beta to an official public release via OTA (Over-the-Air). For example, you can go from iOS 18.3 RC to iOS 18.3.1 or iOS 18.3.2.
These profiles are only valid for around three months, so you’ll need to install your desired version before its profile expires.
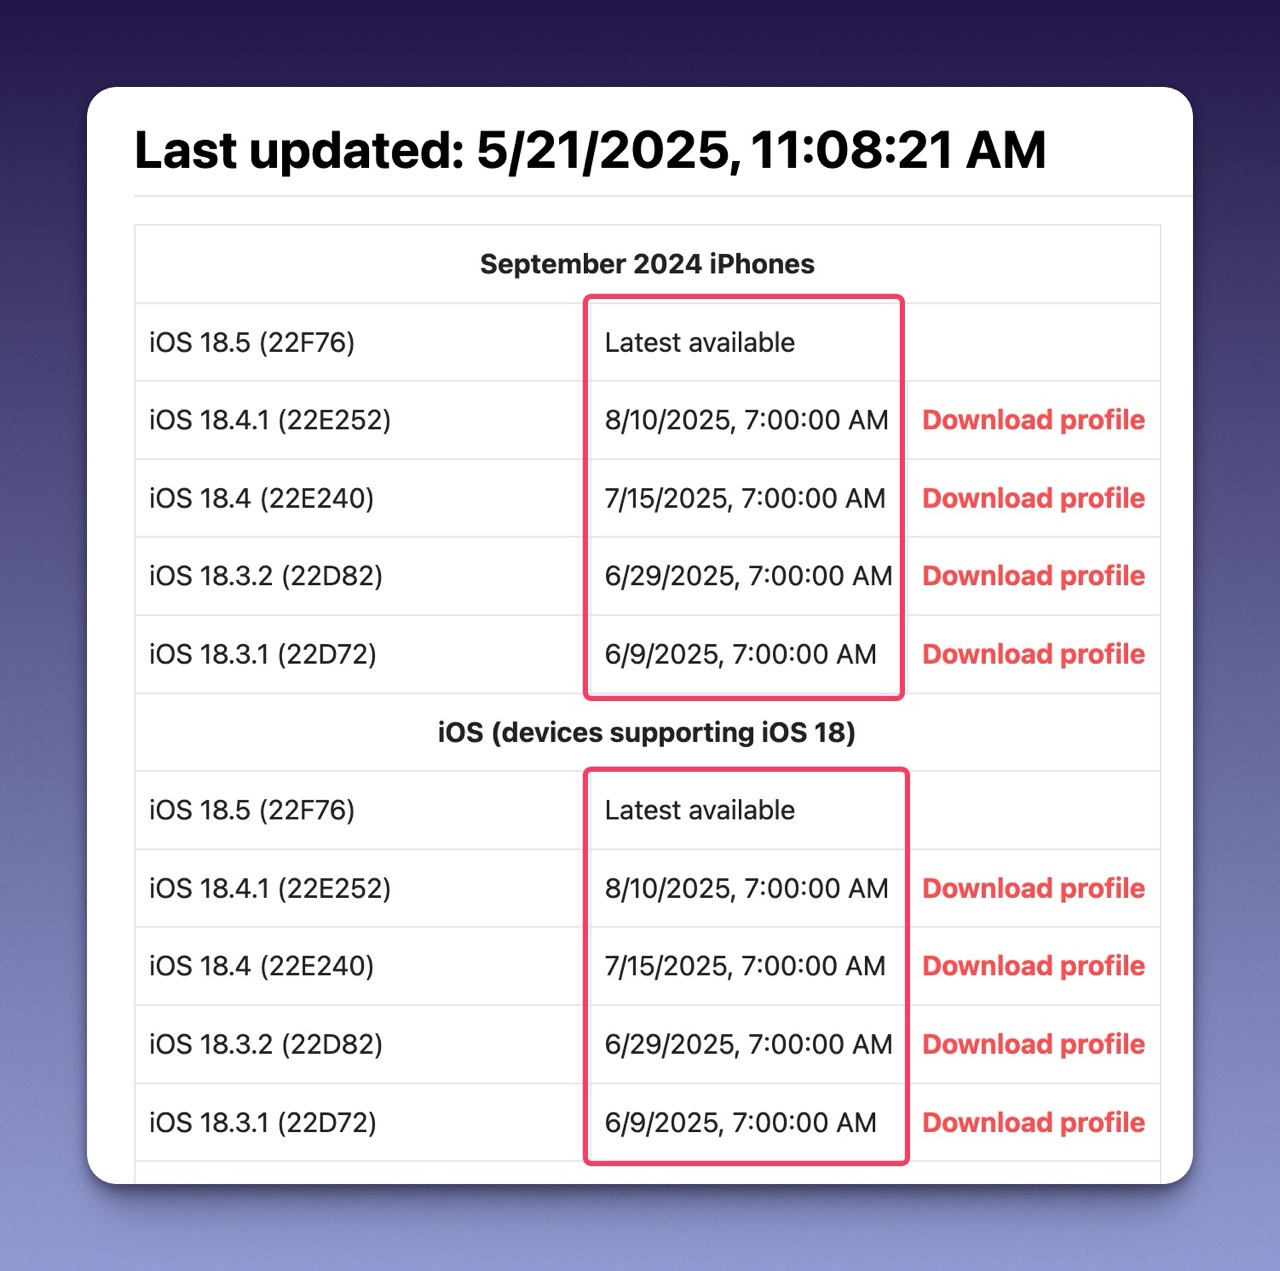
You can check the expiration dates for available OTA profiles at dhinakg.github.io/delayed-otas.html.
Preparation
- Mac or Windows computer
- Lightning or USB-C cable, usually the one included with your iPhone, iPad
- The latest version of iTunes if on Windows
- The latest version of Nugget
Step 0: Make a Backup First
Before doing anything, it’s strongly recommended that you back up your device using Finder (on macOS) or iTunes (on Windows). This ensures you can restore all your data if anything goes wrong during the process.
Disclaimer: I’m not responsible for any data loss if you proceed without backing up your device.
Step 1: Install the Beta Version
Skip this step if your device has already been downgraded or is currently running an iOS/iPadOS Beta version.
If your device is on a newer version, you’ll need to downgrade to an iOS/iPadOS Beta by using a beta IPSW file, which you can download from ipsw.dev.
Make sure to only download files labeled “Signed”, as only signed versions can be restored using iTunes or Finder.
To keep things simple, you’ll find step-by-step instructions on how to install a beta IPSW file below:
Step 2: Enable Supervision
To install a Delayed OTA profile, you’ll need to enable Supervision on your device. Just follow the steps below:
-
Connect your iPhone or iPad to your Mac or Windows PC using a USB-C or Lightning cable.
-
Open Nugget.
-
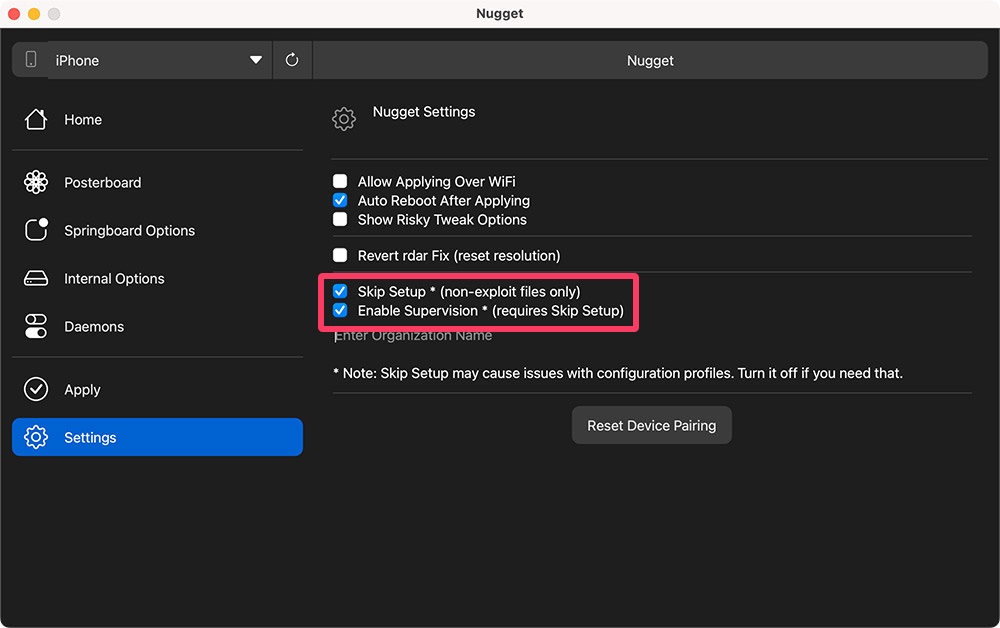
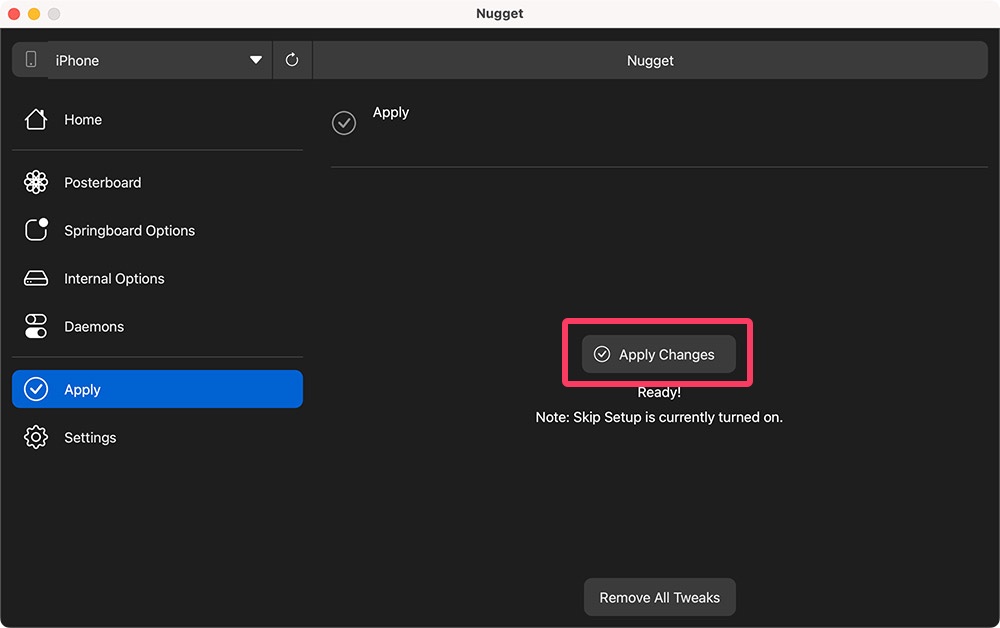
In Nugget, go to the Settings tab on the left sidebar. Check the box for “Enable Supervision” and make sure “Skip Setup” is also selected.
-
Then go to the Apply tab on the left, and click Apply Changes.
-
Your device will restart automatically.
To confirm that Supervision is enabled, open the Settings app on your device, you should see a message indicating the device is supervised. If not, try repeating the steps above.
Step 3: Install Delayed OTAs profile
-
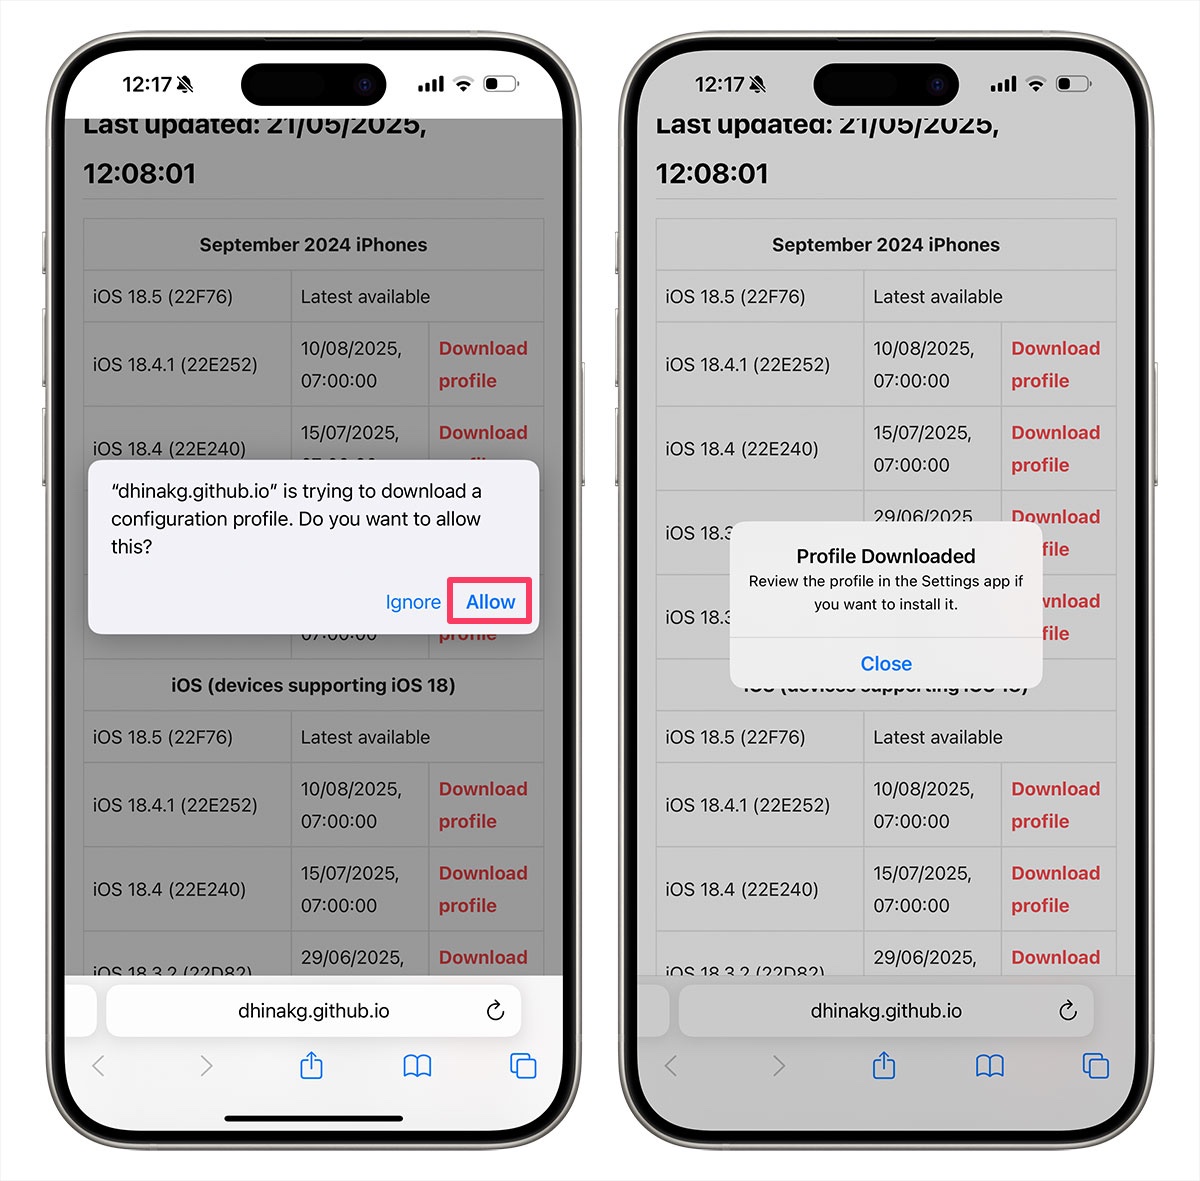
On your iPhone or iPad, open Safari and go to dhinakg.github.io/delayed-otas.html.
-
Check your device model and select the version you want to update to, then tap “Download profile.” Note: iOS and iPadOS use different profiles, so be sure to scroll down to find the profiles specifically for iPad if needed.
For example, “September 2024 iPhones” refers to the iPhone 16 series, while “iOS (devices supporting iOS 18)” covers the rest of the iPhones compatible with iOS 18.
-
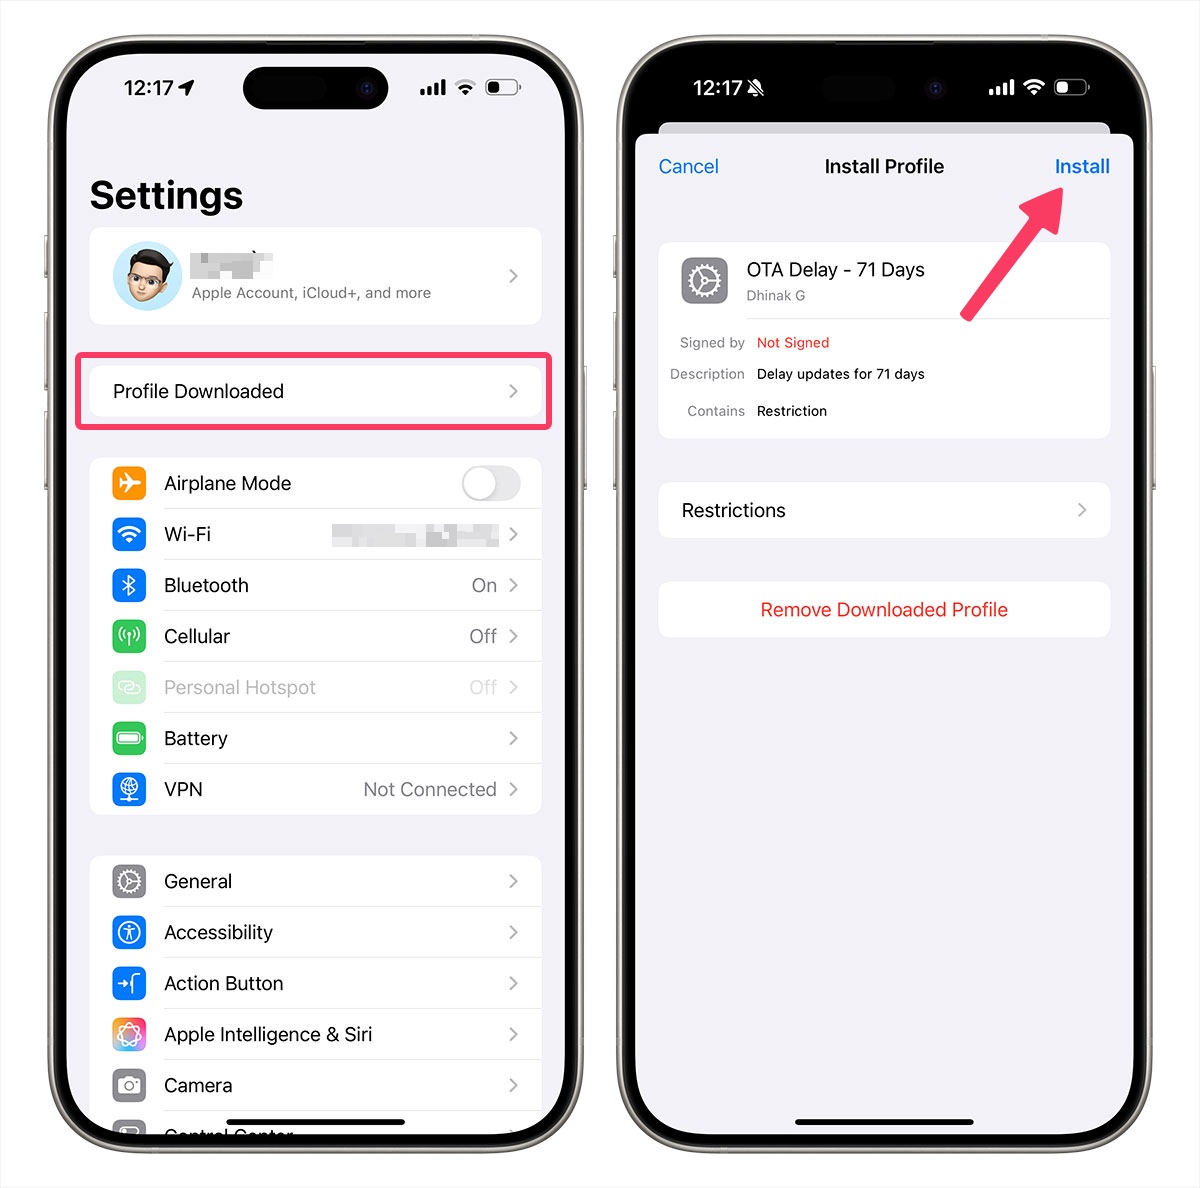
Allow the profile to be installed, then go to Settings > Profile Downloaded and tap Install to proceed.
-
In Settings , go to General > Software Update .
-
Make sure the update version you want appears.
-
Tap Update Now to begin downloading and installing the update.
-
Once the update is complete, remove the Delayed OTA profile by going to Settings > VPN & Device Management.
Step 4: Exit Supervision
After the previous steps, your device is still supervised. To turn off supervision, follow these steps:
- Connect your iPhone or iPad to your Mac or Windows PC using a USB-C or Lightning cable.
- Open Nugget.
- In Nugget, go to the Settings tab on the left and uncheck “Enable Supervision.”
- Next, switch to the Apply tab and click Apply Changes.
- Your device will restart and supervision will be remove.
To double-check, open the Settings app. If you don’t see any message about supervision, you’ve successfully turned it off. If the message is still there, just repeat the steps.
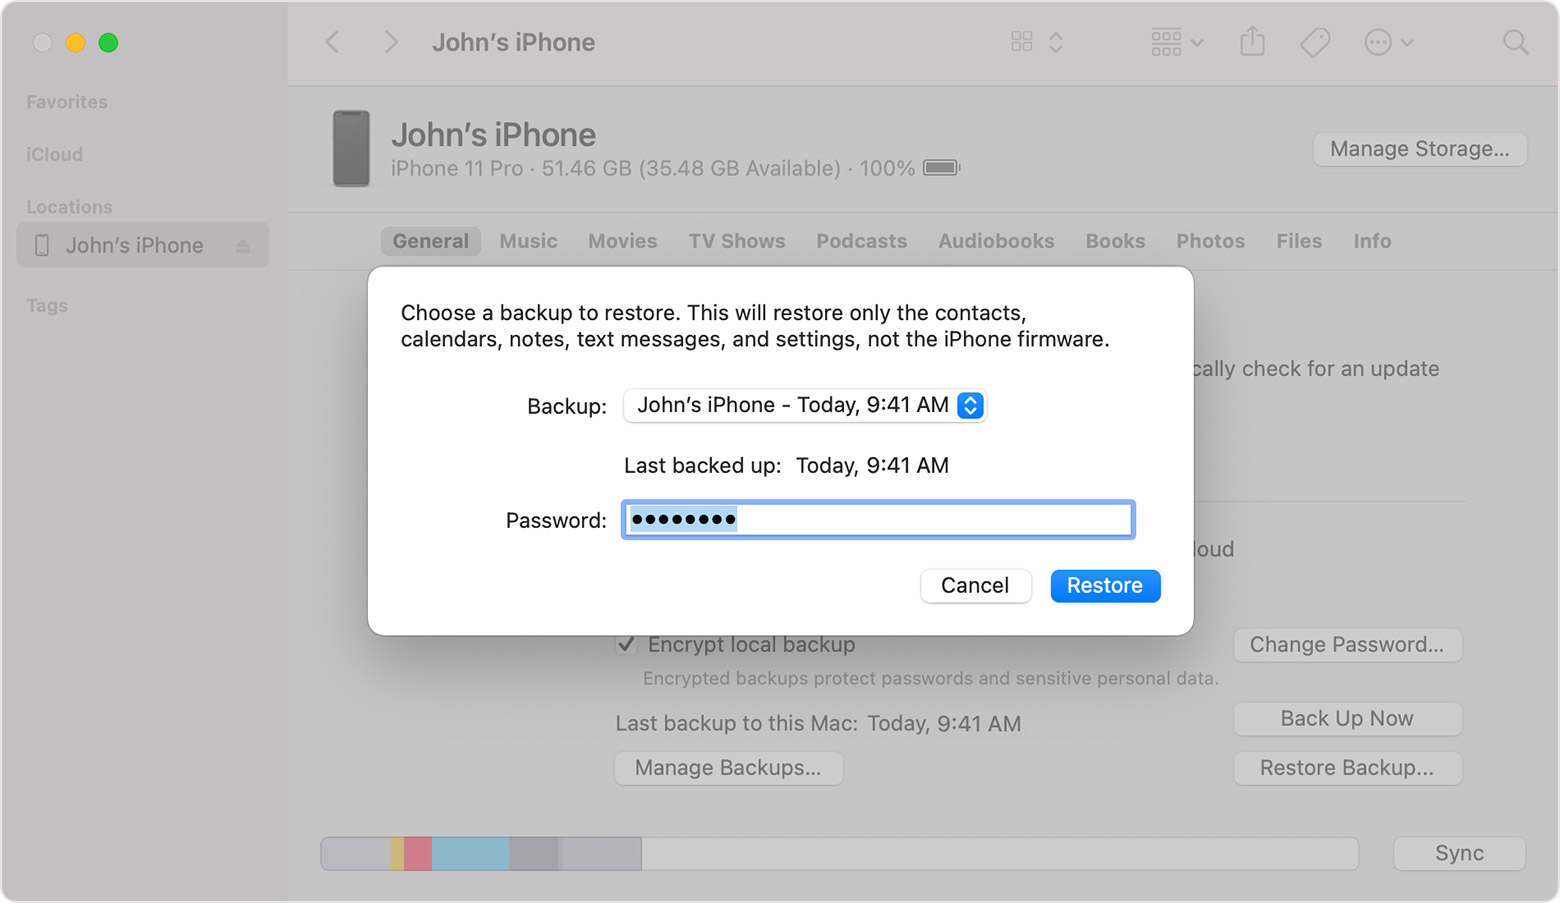
Step 5: Restoring Data
Apple doesn’t let you restore backups made on a newer iOS version to an older one. For example, a backup from iOS 18.5 won’t work on iOS 18.3.2. But I’ll share a simple trick to bypass this limitation.
- On a Mac, navigate to this folder:
~/Library/Application Support/MobileSync/Backup/0xxxxxxxxxxxxxxxxxxxxxxx
Or on Windows, go to this folder:
C:\Users\<Your-Windows-Username>\AppData\Roaming\Apple Computer\MobileSync\Backup\0xxxxxxxxxxxxxxxxxxxxxxx
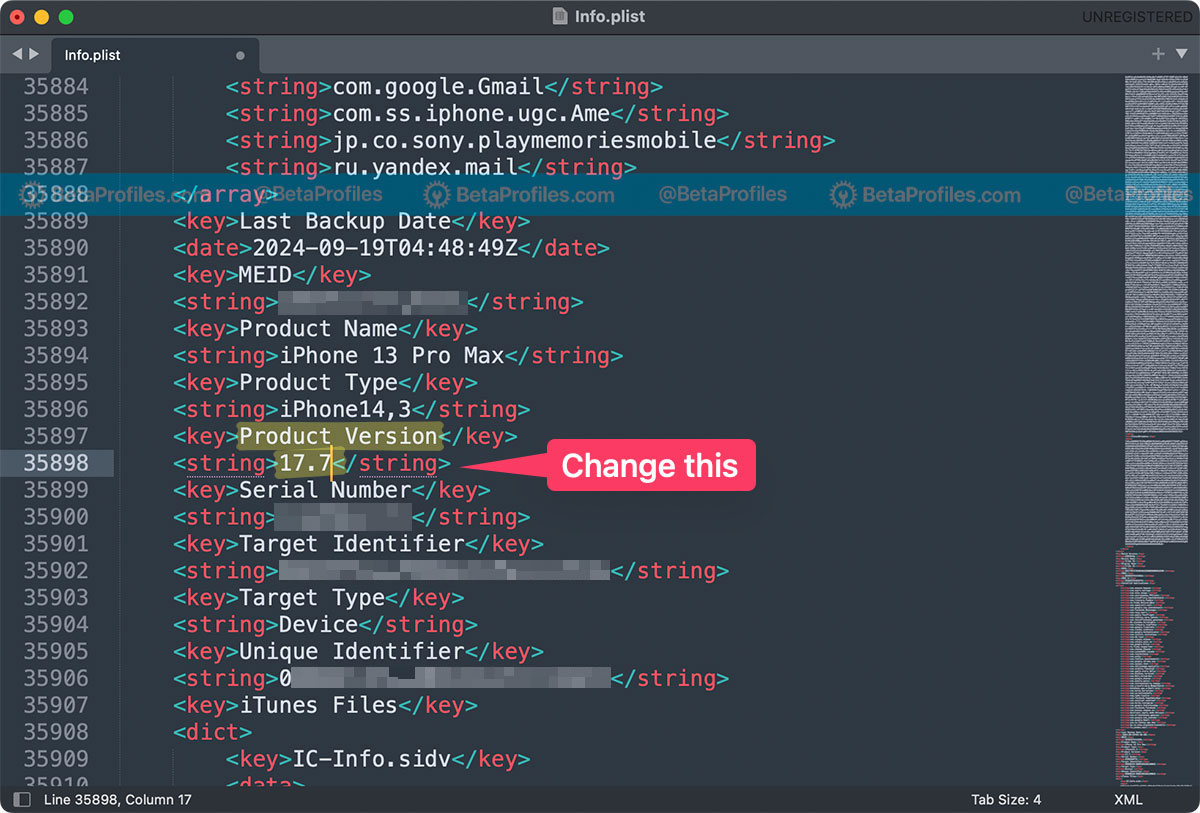
- Find the most recent backup folder, then open the file called Info.plist using a text editor like TextEdit on Mac or Notepad on Windows.
- Search for the line that says
Product Version(you can press Cmd + F on Mac or Ctrl + F on Windows to find it quickly). Change the version number below it to18.3.2(or whichever version you downgraded to) and save the file.
- Connect your iPhone or iPad to your Mac or Windows PC with a USB-C or Lightning cable.
- Open Finder or iTunes, select the option to restore from your latest backup, and wait for the process to complete.
And that’s it! If you run into any issues or have questions, just leave a comment below and I’ll be glad to help.