I guess you’ve downloaded and installed iOS 17.5 beta on your device in the past few days, right? Although iOS 17.5 brings some exciting features but some devices may encounter issues such as overheating, battery drain, or lag after installing iOS 17.5 beta. This is completely normal because it’s a major update and it’s currently in the beta stage.
![]() Here’s What’s New in iOS 17.5 Beta
Here’s What’s New in iOS 17.5 Beta
If you don’t want these issues to occur on your daily-used iPhone, here’s a guide to downgrade from iOS 17.5 beta to iOS 17.4.1 without losing data.
Important Note: If you have an Apple Watch enrolled in the watchOS 10.5 beta, restoring your paired iPhone to a previously-released OS version is not recommended as it will no longer pair properly.
Preparation
- Mac or Windows computer
- Lightning cable capable of data transfer, usually the one included with your iPhone, iPad
- IPSW file for your device
Download the IPSW file for iOS 17.4.1
- iPhone 15 Pro Max
- iPhone 15 Pro
- iPhone 15 Plus
- iPhone 15
- iPhone 14 Pro Max
- iPhone 14 Pro
- iPhone 14 Plus
- iPhone 14
- iPhone SE (3rd generation)
- iPhone 13
- iPhone 13 Pro
- iPhone 13 Pro Max
- iPhone 13 mini
- iPhone 12, iPhone 12 Pro
- iPhone 12 Pro Max
- iPhone 12 mini
- iPhone 11 Pro, iPhone 11 Pro Max
- iPhone 11
- iPhone XS, iPhone XS Max
- iPhone XR
- iPhone SE (2nd generation)
Download the IPSW file for iPadOS 17.4.1
- 11-in. iPad Pro (4th generation), 12.9-in. iPad Pro (6th generation)
- 10.2-in. iPad (10th generation)
- iPad Air (5th Generation)
- iPad mini (6th generation)
- 10.2-in. iPad (9th generation)
- 11-in. iPad Pro (3rd generation), 12.9-in. iPad Pro (5th generation)
- iPad Air (4th generation)
- 10.2-in. iPad (8th generation)
- 11-in. iPad Pro (1st and 2nd generations), 12.9-in. iPad Pro (3rd and 4th generations)
- 10.5-in. iPad Pro (1st generation), 12.9-in. iPad Pro (2nd generation)
- iPad (6th generation)
- iPad mini (5th generation), iPad Air (3rd generation)
- 10.2-in. iPad (7th generation)
Downgrade Guide
- Open Finder on your Mac or iTunes on your Windows computer. If you don’t have iTunes, download it here.
- Connect your device to your Mac or Windows computer using a USB to Lightning/USB-C cable.
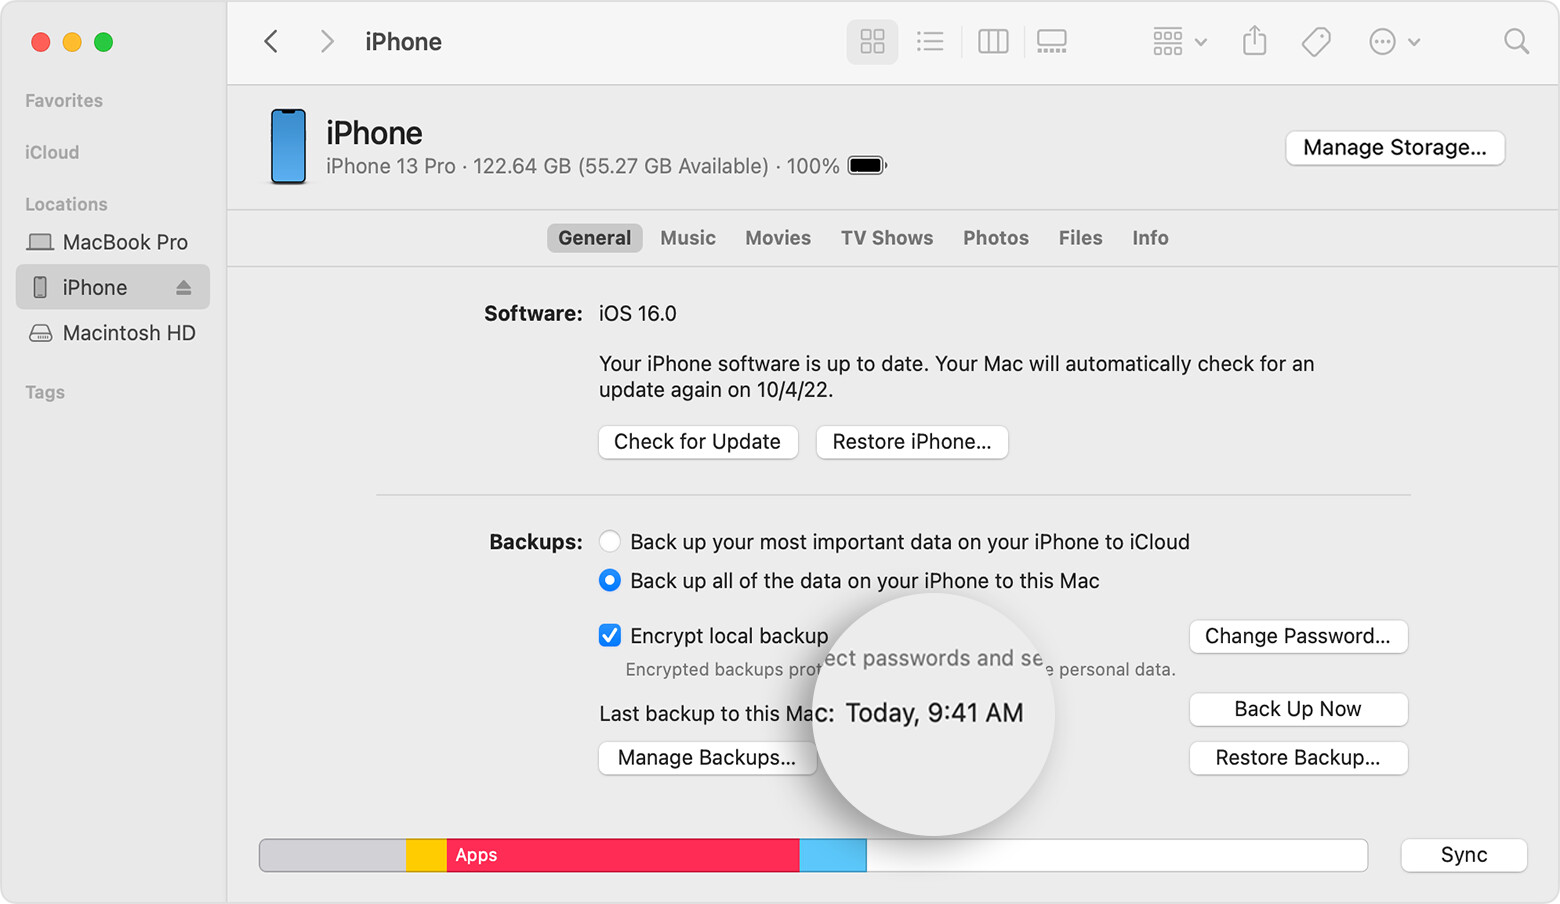
- Backup your device using iTunes or Finder. Select the option to back up all your data to your Mac or Windows computer, then click the ‘Backup Now’ button.
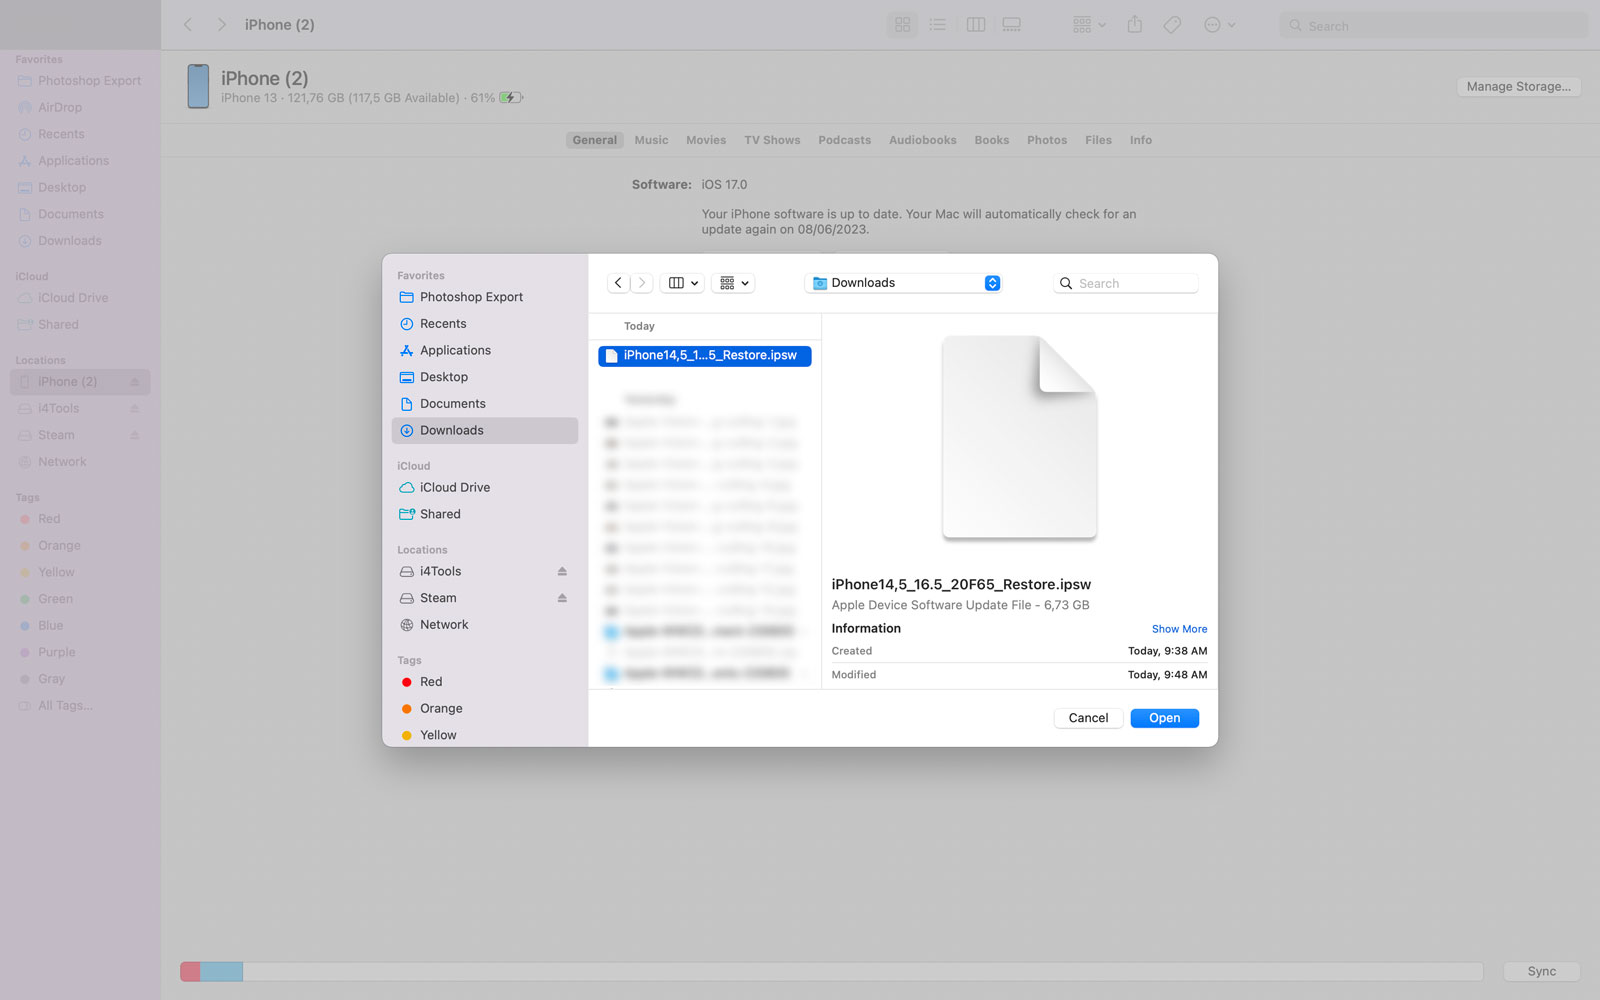
- After the backup is complete, hold down the Option key (macOS) or Alt key (Windows) + click on the “Restore iPhone/iPad” button. A window will appear for you to select the .ipsw file you downloaded earlier.
- Wait for the restore process to complete, then follow the on-screen steps to complete the activation.
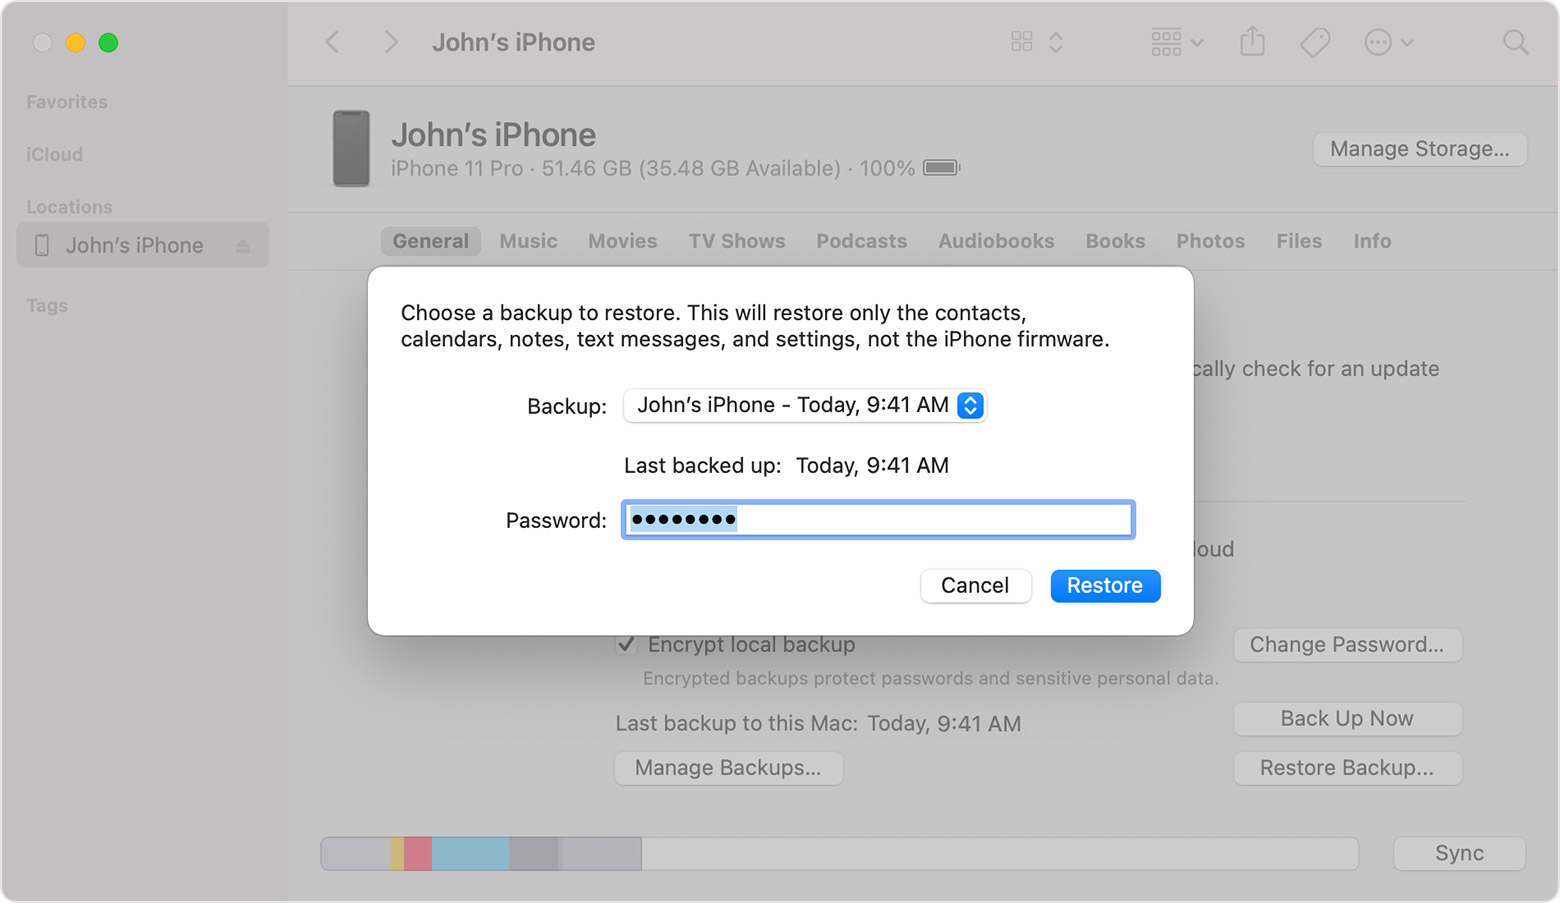
- When prompted by iTunes/Finder to restore from a backup, select the backup you made in Step 3. Then select “Continue” and iTunes will restore your device.
- After the restore from backup process is complete, your device will restart. Follow the on-screen instructions to complete the setup.
If you don’t want to download the .ipsw file
The steps below will help you put your device into recovery mode, and iTunes will automatically download the latest .ipsw file compatible with your device. You don’t need to manually download the ipsw file.
Note: You still need to back up your device beforehand, as the steps below will erase all data on your device.
- Open Finder on your Mac or iTunes on your Windows computer. If you don’t have iTunes, download it here.
- Connect your device to your Mac or Windows computer using a USB to Lightning cable.
- Put your device in recovery mode. The method to do this depends on your specific device, so please check the list below for the steps corresponding to your device. Apple also provides additional information about Recovery Mode in this support article.

- A dialog box will appear asking if you want to restore your device. Click on Restore to erase your device and install the latest public release of iOS or iPadOS.
- Wait until the restore is complete.
- When prompted by iTunes/Finder to restore from a backup, select the backup you have done before.
- Once the restore is complete, your device will reboot, continue to follow the onscreen instructions until it’s done.